Crispy No Yeast Yogurt Bagels
Highlighted under: Everyday Kitchen
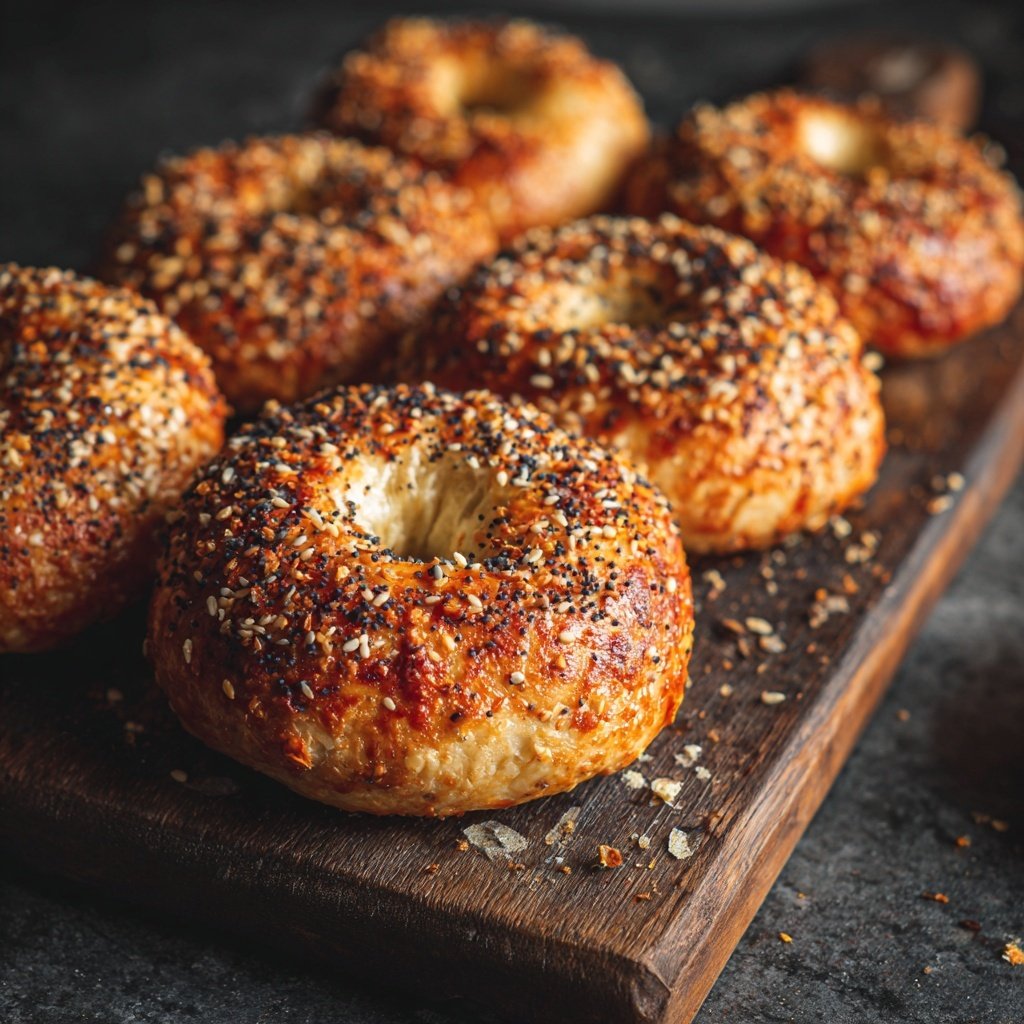
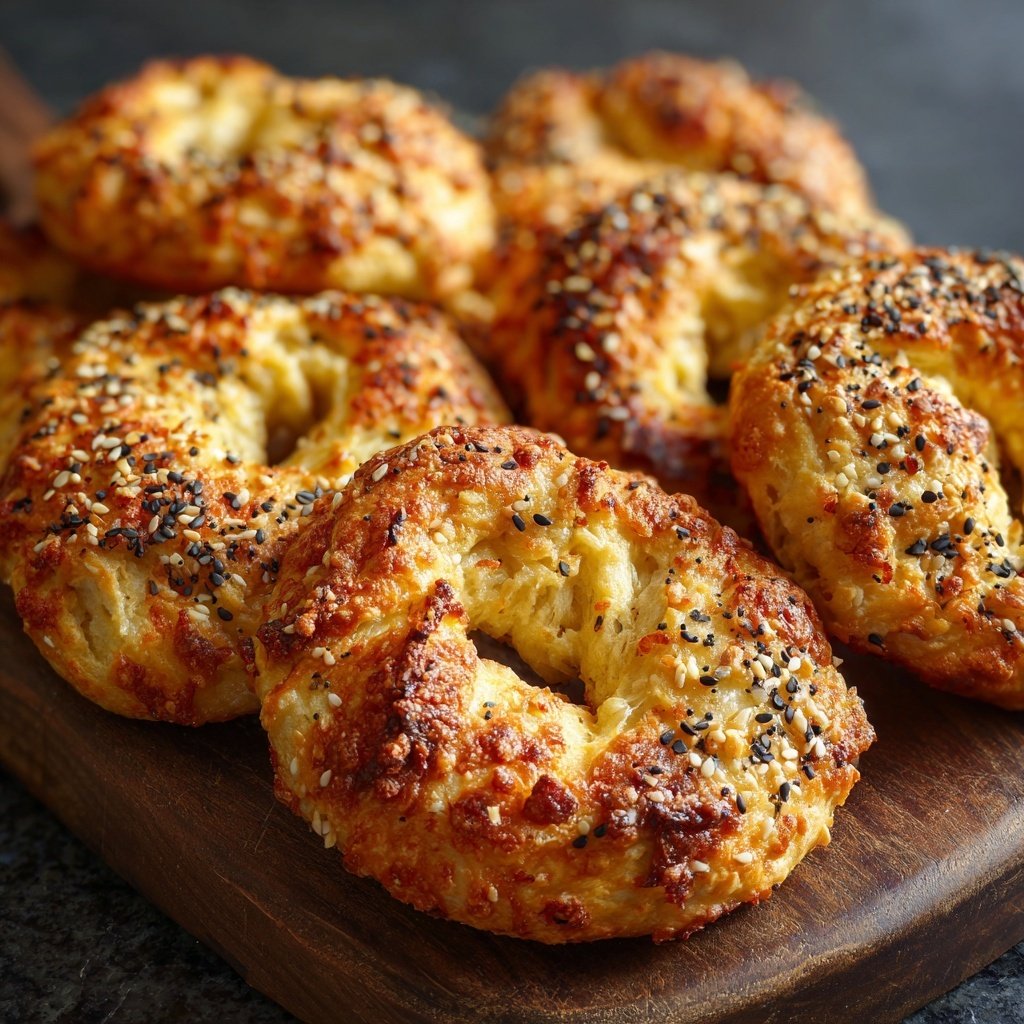
I love whipping up these Crispy No Yeast Yogurt Bagels when I need a quick and satisfying breakfast. They come together in no time and have a delightful crunch that makes every bite enjoyable. The yogurt gives them a unique flavor and a soft texture that you won't find in traditional bagels. I often experiment with toppings from everything bagel seasoning to savory cheese. It’s become one of my go-to recipes for friends and family, ensuring delicious results every time.
When I first tried making bagels without yeast, I was skeptical of how they would turn out. However, this recipe quickly changed my mind! The combination of yogurt and self-rising flour creates a quick dough that’s both easy to handle and delicious. It’s fascinating to see how a simple ingredient swap can yield such a satisfying result.
Each time I bake these bagels, I play around with different flavors, from garlic to herbs. Once, I even added chopped sun-dried tomatoes for a Mediterranean twist. What I discovered is that these bagels can be a fun canvas for creativity while being an absolute hit at breakfast or brunch gatherings!
Why You'll Love This Recipe
- Quick and easy to prepare with no waiting for dough to rise
- Crispy exterior with a wonderfully chewy interior
- Versatile - customize with your favorite toppings
Understanding Your Ingredients
The combination of self-rising flour and Greek yogurt creates the unique texture of these bagels. Self-rising flour contains leavening agents, allowing the bagels to rise without yeast. The yogurt adds moisture and a slight tang, enhancing the flavor profile. Using full-fat Greek yogurt ensures a richer taste; however, you can substitute with low-fat or dairy-free yogurt for a lighter version, keeping in mind it may alter the bagels' texture. Make sure your yogurt is at room temperature to easily incorporate it into the flour.
Salt plays a significant role in enhancing the flavor throughout the bagel. I recommend starting with a pinch of salt when mixing the dough. You can adjust this based on your toppings and personal preference. Additionally, topping choices are virtually endless—don’t hesitate to experiment with spices or cheese to achieve your desired flavor. This versatility allows you to make each batch uniquely appealing.
Perfecting Your Baking Technique
Kneading the dough is a crucial step that transforms a sticky mixture into a smooth, cohesive one. Knead gently on a lightly floured surface for about 2 minutes. If the dough feels too sticky, add a bit more flour, but avoid overworking it, as that can lead to dense bagels. Keep an eye on the texture; it should be smooth and slightly elastic. This prevents the bagels from being too tough once baked.
Baking at the right temperature is key for achieving that golden-brown crust we all love. Set your oven to 375°F (190°C) and use an oven thermometer if you have one. This ensures even baking. Watch for visual cues: once the bagels turn golden at the edges, they are likely ready to come out. If you want an extra crunchy exterior, you can leave them in for an additional minute or so, but be careful not to burn them.
Ingredients
Gather the following ingredients before you start:
Ingredients
- 2 cups self-rising flour
- 1 cup plain Greek yogurt
- 1 egg (for egg wash)
- Salt, to taste
- Toppings: sesame seeds, poppy seeds, everything bagel seasoning, etc.
Make sure to measure your ingredients accurately for the best results.
Instructions
Follow these steps to create your bagels:
Prepare the Dough
In a mixing bowl, combine the self-rising flour and Greek yogurt. Stir until the mixture starts to come together, then knead it on a floured surface for about 2 minutes until smooth.
Shape the Bagels
Divide the dough into four equal parts. Roll each piece into a rope and shape it into a bagel by connecting the ends. Make sure to pinch the ends together well.
Preheat the Oven
Preheat your oven to 375°F (190°C) while you prepare the bagels.
Egg Wash and Toppings
Place the bagels on a parchment-lined baking sheet. Brush them with the beaten egg and sprinkle your desired toppings on top.
Bake
Bake the bagels in the preheated oven for about 15 minutes or until golden brown.
Cool and Serve
Remove the bagels from the oven and let them cool for a minute or two. Serve warm with your favorite spreads or toppings!
Enjoy your freshly baked bagels right out of the oven!
Pro Tips
- For a more flavorful bagel, consider adding spices to the dough, such as garlic powder or onion powder.
Serving Suggestions
These bagels are best enjoyed warm straight from the oven! I love adding a spread of cream cheese or homemade herb butter. You can also serve them with avocado, smoked salmon, or a simple slice of cheese for a heartier breakfast option. Their soft interior makes them perfect for holding fillings, so feel free to get creative with your toppings.
Try slicing the bagels in half and toasting them for an even crunchier texture. A light smear of garlic butter prior to toasting elevates the flavor profile considerably. Additionally, these bagels make a great base for breakfast sandwiches with eggs and vegetables if you're looking for a more filling meal.
Storage and Make-Ahead Tips
These bagels can be made ahead of time and stored in an airtight container at room temperature for up to two days. For longer storage, freeze them after they cool completely. Wrap each bagel tightly in plastic wrap and place them in a zip-top freezer bag. They can last up to three months in the freezer. When ready to enjoy, simply thaw at room temperature or pop them in the toaster straight from the freezer.
If you're planning a brunch, prepare the dough and shape the bagels the day before. Keep them covered in the refrigerator overnight, which allows the flavors to meld. Bake them fresh in the morning; the slight chill won’t affect the baking time significantly but might require an extra minute in the oven.
Questions About Recipes
→ Can I use regular yogurt instead of Greek yogurt?
Yes, but Greek yogurt provides a thicker texture, which helps with the dough consistency.
→ Can I store the bagels for later?
Absolutely! Store them in an airtight container in the fridge for up to 3 days, or freeze them for longer storage.
→ What can I use if I don't have self-rising flour?
You can make your own by combining all-purpose flour with baking powder and salt.
→ Do I need to boil the bagels like traditional recipes?
No, these bagels are baked directly and don't require boiling, making them quicker and easier to prepare.
Crispy No Yeast Yogurt Bagels
Created by: Vanessa Whitlock
Recipe Type: Everyday Kitchen
Skill Level: Beginner
Final Quantity: 4 bagels
What You'll Need
Ingredients
- 2 cups self-rising flour
- 1 cup plain Greek yogurt
- 1 egg (for egg wash)
- Salt, to taste
- Toppings: sesame seeds, poppy seeds, everything bagel seasoning, etc.
How-To Steps
In a mixing bowl, combine the self-rising flour and Greek yogurt. Stir until the mixture starts to come together, then knead it on a floured surface for about 2 minutes until smooth.
Divide the dough into four equal parts. Roll each piece into a rope and shape it into a bagel by connecting the ends. Make sure to pinch the ends together well.
Preheat your oven to 375°F (190°C) while you prepare the bagels.
Place the bagels on a parchment-lined baking sheet. Brush them with the beaten egg and sprinkle your desired toppings on top.
Bake the bagels in the preheated oven for about 15 minutes or until golden brown.
Remove the bagels from the oven and let them cool for a minute or two. Serve warm with your favorite spreads or toppings!
Extra Tips
- For a more flavorful bagel, consider adding spices to the dough, such as garlic powder or onion powder.
Nutritional Breakdown (Per Serving)
- Calories: 220 kcal
- Total Fat: 3g
- Saturated Fat: 1g
- Cholesterol: 30mg
- Sodium: 180mg
- Total Carbohydrates: 36g
- Dietary Fiber: 1g
- Sugars: 1g
- Protein: 8g